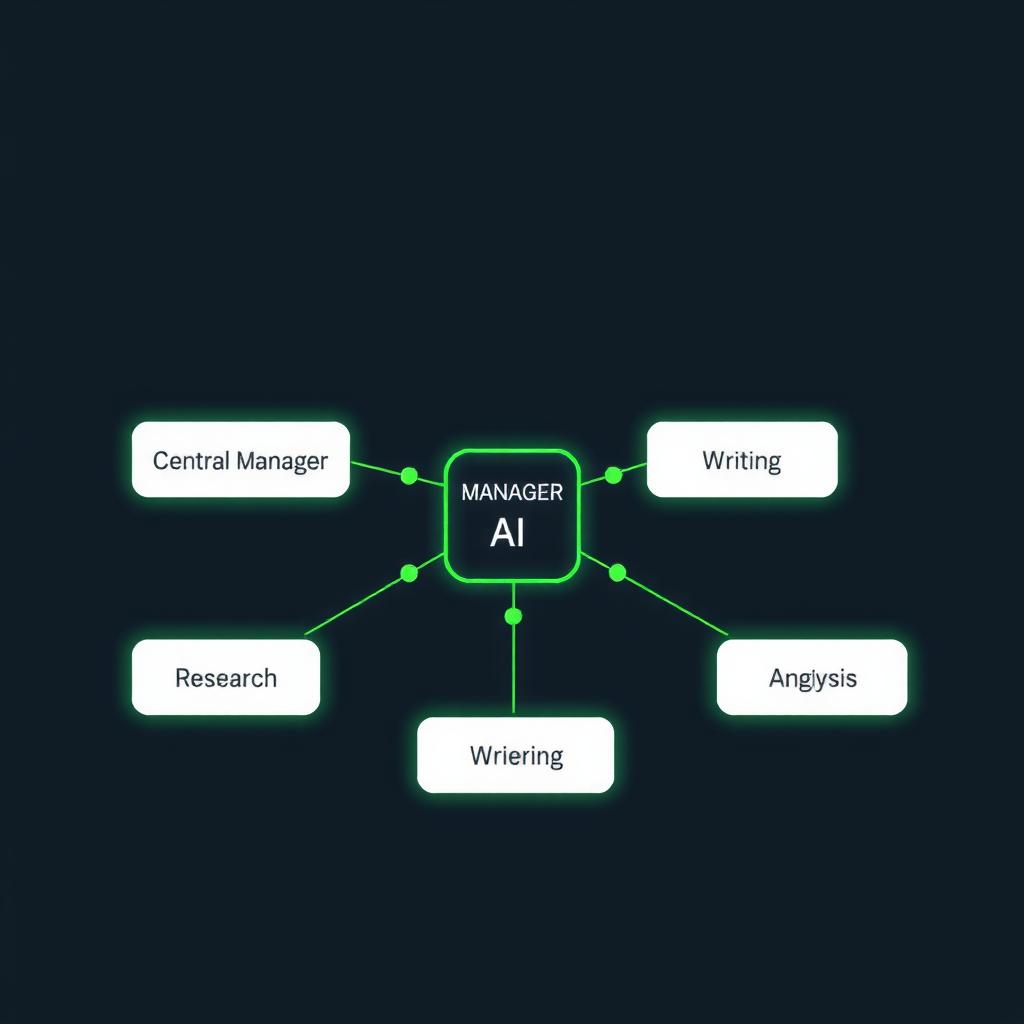
How to Build a Team of AI Agents in n8n With No Code — Complete Tutorial
Step-by-step guide to building a multi-agent system in n8n where a manager agent delegates tasks to specialized sub-agents — no coding required.
TL;DR: This tutorial shows you how to build a multi-agent AI system in n8n — a manager agent that delegates tasks to specialized sub-agents. You’ll build a content research pipeline: a research agent finds information, a writing agent formats it, and an analysis agent checks quality. No code required. Total time: about 90 minutes.
Why build a team of AI agents instead of one?
A single AI agent works fine for simple tasks — summarize an email, answer a FAQ, look up a fact. But as soon as you need a workflow that involves multiple types of thinking — researching a topic, writing about it, and checking the output — one agent trying to do everything starts making mistakes.
Multi-agent systems solve this by splitting work across specialized agents, each with its own system prompt, tools, and memory. A 2025 n8n blog post on multi-agent architectures showed that specialized agents outperform generalist agents on complex multi-step tasks because each agent stays focused on one role [1]. The n8n community has been actively building these patterns since early 2026, with templates like the “Beginner manager agent with sub-agent tools” workflow [2] showing how to route tasks to the right specialist.
If you’re new to n8n entirely, start with our Build Your First AI Agent in n8n guide first — this tutorial builds on those concepts.
What you’ll build
By the end of this tutorial, you’ll have a multi-agent content research system with three specialized agents:
| Agent | Role | Tools |
|---|---|---|
| Manager Agent | Receives your request and decides which sub-agent should handle it | HTTP Request tools calling sub-workflows |
| Research Agent | Searches the web for information on a topic | Web search tool, content extraction |
| Writing Agent | Formats research into a structured output | OpenAI text generation |
| Analysis Agent | Reviews the output for quality and coverage | OpenAI text analysis |
The manager acts like a team lead: it interprets what you ask, hands work to the right specialist, collects their output, and returns a cohesive result.
Prerequisites
| Item | Cost | Where to get it |
|---|---|---|
| n8n account (cloud or self-hosted) | Free trial or $0 (self-hosted) | n8n.io |
| OpenAI API key | ~$2-3 for this tutorial | platform.openai.com/api-keys |
| n8n beginner experience | Free | Our first n8n agent tutorial |
You’ll need to have completed the basic n8n tutorial (or have equivalent experience with AI Agent nodes, system prompts, and tools). If you’re self-hosting n8n, make sure your sub-workflow feature is enabled — it’s available in n8n 1.70+.
How multi-agent architecture works in n8n
The pattern we’re using is called coordinator with sub-agents. It works like this:
- A Manager Agent (the coordinator) has tools that point to sub-workflows
- Each sub-workflow contains a specialized AI Agent with its own tools and system prompt
- When the manager decides a task needs a specialist, it calls the sub-workflow via the Execute Sub-Workflow tool node
- The sub-workflow runs, returns its output, and the manager uses that output to continue
This approach is officially supported by n8n and documented in their multi-agent system guide [1]. The n8n community has built dozens of variations on this pattern — from content pipelines to customer support triage systems [3].
The alternative pattern (simpler but less flexible) is to give the manager agent direct tool access to everything, but that gets messy fast. Sub-workflows keep each agent’s configuration isolated and testable.
Step 1: Create the research sub-agent workflow
Let’s start from the bottom up — build the specialized agents first, then wire them together with the manager.
Create a new workflow
- Log into your n8n instance and click Workflows > New Workflow
- Name it Research Agent
- Add a Webhook node as the trigger — this lets the manager agent call this workflow
- Set Webhook Type to GET
- Copy the production URL — you’ll need it later
- Add an AI Agent node connected to the webhook
- Model: OpenAI GPT-4o (or Claude 3.5 Sonnet if you prefer Anthropic)
- System Prompt: “You are a research specialist. Your job is to find accurate, up-to-date information on any topic. Use your web search tool to find at least 3 sources. For each source, extract the key facts. Return your findings as a structured list with source URLs.”
- Memory: Window Buffer Memory (last 10 messages)
Add the web search tool
- Add a Tool > Web Search node and connect it to the AI Agent node
- If you’re self-hosting, you can use SerpAPI, Tavily, or a free Google Programmable Search Engine
- For n8n cloud, the built-in Web Search tool uses Tavily by default
- Test the workflow: click Execute Workflow and send a test payload with
{ "topic": "AI automation trends 2026" } - Verify the agent returns search results with source URLs
Configure the output
- Add a Code node at the end that formats the research output as clean JSON:
// Format research output for the manager agent
const items = $input.all();
const research = items.map(item => ({
  topic: item.json.topic || 'Unknown topic',
  findings: item.json.output,
  timestamp: new Date().toISOString()
}));

return research;- Save and activate this workflow. Copy the webhook production URL.
Step 2: Create the writing sub-agent workflow
-
Create another new workflow named Writing Agent
-
Add a Webhook node as the trigger (same as before)
-
Add an AI Agent node
- Model: OpenAI GPT-4o
- System Prompt: “You are a writing specialist. You receive research data and must format it into a clear, well-structured summary. Use headings, bullet points, and short paragraphs. Keep the tone informative and neutral. Always include source citations from the research data provided.”
- Memory: Window Buffer Memory
-
This agent doesn’t need external tools — it just reformats the research it receives
-
Add a Code node to structure the output:
// Structure the writing output
const items = $input.all();
return items.map(item => ({
  formatted_output: item.json.output,
  word_count: item.json.output ? item.json.output.split(' ').length : 0,
  format_version: 'v1'
}));- Save, activate, and copy the webhook URL
Step 3: Create the analysis sub-agent workflow
-
Create a third workflow named Analysis Agent
-
Add a Webhook trigger
-
Add an AI Agent node
- Model: OpenAI GPT-4o
- System Prompt: “You are a quality analysis specialist. Review the content provided and check for: factual claims without sources, unclear statements, missing context, and logical gaps. Return a structured report with: issues found (list), overall quality score (1-10), and suggestions for improvement.”
- Memory: Window Buffer Memory
-
No external tools needed — this agent analyzes text directly
-
Add a Code node for output formatting:
// Format analysis report
const items = $input.all();
return items.map(item => ({
  analysis: item.json.output,
  reviewed_at: new Date().toISOString()
}));- Save, activate, and copy the webhook URL
Step 4: Build the manager agent workflow
Now for the main event — the manager that coordinates all three specialists.
- Create a new workflow named Content Research Manager
- Add a Manual trigger (or Webhook if you want to call this from outside n8n)
- Add an AI Agent node — this is your manager agent
- Model: OpenAI GPT-4o (use GPT-4o here — it handles complex routing better)
- System Prompt:
You are a manager agent that coordinates a team of specialized AI agents.

Your team:
1. Research Agent — searches the web and finds information on any topic
2. Writing Agent — formats research into clean, structured content
3. Analysis Agent — reviews content for quality and accuracy

When a user asks a question or requests content:
1. First, call the Research Agent with the user's topic
2. Pass the research results to the Writing Agent for formatting
3. Pass the formatted content to the Analysis Agent for quality review
4. Return the final output with all three stages documented

If the user's request is simple (like "what's the weather"), answer directly without calling sub-agents.
Add sub-workflow tools
The key to this pattern is giving the manager agent tools that call sub-workflows. n8n has two approaches:
Option A: Execute Sub-Workflow Node (recommended)
- Add an Execute Sub-Workflow node for each sub-agent workflow
- Configure each to call the corresponding workflow you built in Steps 1-3
- Map the input/output fields correctly
Option B: HTTP Request Tool (more portable)
- Add an HTTP Request tool node connected to the AI Agent
- Configure it to send a GET request to each sub-workflow’s webhook URL
- Set Authentication to none (or your n8n API key if self-hosted)
For this tutorial, use Option A — it’s cleaner and handles errors better.
- Connect all three Execute Sub-Workflow nodes to the AI Agent node as Tools
- Add a Code node after the AI Agent to clean up the final output:
// Compile final response
const items = $input.all();
return items.map(item => ({
  request: item.json.input,
  research: item.json.research_summary,
  content: item.json.formatted_content,
  quality_score: item.json.quality_analysis,
  completed_at: new Date().toISOString()
}));
Step 5: Test the full pipeline
- Click Execute Workflow on the manager
- Enter a test request: “Research the best no-code AI tools for small businesses in 2026”
- Watch the manager decide which sub-agents to call
- Verify each sub-workflow executes and returns data
- Check the final output includes:
- Research findings with sources
- Formatted content
- Quality analysis
![Screenshot description: n8n canvas showing the manager AI Agent node connected to three sub-workflow tool nodes labeled Research Agent, Writing Agent, and Analysis Agent, with green checkmarks on completed nodes]
If a sub-workflow fails, check:
- Is the sub-workflow activated? (toggle in the top bar)
- Does the webhook URL match in the Execute Sub-Workflow configuration?
- Are your API keys still valid?
Real use case: content research pipeline
Here’s how you’d use this in practice. Imagine you run a small marketing agency and a client asks: “What are the top trends in email marketing for 2026?”
Instead of spending two hours researching and writing, you:
- Drop the question into your manager agent
- The research agent finds 5-7 relevant articles with statistics
- The writing agent formats them into a structured brief
- The analysis agent checks for source quality and coverage gaps
- You get back a complete research brief in under 5 minutes
The n8n community has used this exact pattern for:
- Competitor analysis reports [3]
- Customer support ticket triage with escalation paths
- Social media content calendars with trend research
- Client onboarding document generation
Customizing your agent team
The three-agent pattern is a template — you can mix and match:
| Replace the research agent with | To build |
|---|---|
| A database query agent | Internal knowledge base Q&A |
| An email sender agent | Automated outreach sequences |
| A Slack messenger agent | Alert and notification pipelines |
| A document parser agent | Invoice or contract processing |
The key insight: each sub-agent should have one job and do it well. If you find yourself adding too many tools to one sub-agent, split it into two.
For more advanced patterns, check out the n8n AI agent architecture guide [4] which covers topologies like:
- Router pattern — single agent that classifies and routes (simpler but less flexible)
- Parallel execution — multiple agents working simultaneously using the Execute Sub-Workflow node with async mode
- Feedback loop — agents that review and refine each other’s output
Troubleshooting common issues
| Symptom | Likely cause | Fix |
|---|---|---|
| Manager agent doesn’t call sub-agents | System prompt too vague — agent doesn’t know when to delegate | Add explicit instructions: “ALWAYS call the Research Agent first for any factual question” |
| Sub-workflow returns empty data | Webhook not receiving payload correctly | Check the Execute Sub-Workflow node mapping — ensure input fields match |
| Agent ignores one of its tools | Token limit or tool count exceeded | Reduce the number of tools or increase the context window |
| Output is too long or truncated | Token limit hit on the model | Add a Code node to summarize output before returning |
Key takeaway
A single AI agent is like a freelancer who does everything — competent but easily overwhelmed. A multi-agent system is like a small agency: you have a project manager (the coordinator) who hands work to a researcher, a writer, and an editor. Each specialist is better at their job than a generalist would be.
You built exactly that today — no coding required. The same pattern powers production systems handling thousands of requests per day at companies using n8n in 2026 [4].
Next steps:
- Set the manager agent on a schedule using an n8n Cron trigger to generate daily research briefs
- Add a Slack or email notification node to deliver results automatically
- Try the parallel execution pattern for tasks that don’t depend on each other
References
[1] n8n Blog. “Multi-agent system: Frameworks & step-by-step tutorial.” December 2025. https://blog.n8n.io/multi-agent-systems/
[2] n8n Workflow Templates. “Beginner manager agent with sub-agent tools.” 2025–2026. https://n8n.io/workflows/7158-beginner-manager-agent-with-sub-agent-tools/
[3] n8n Community. “How I Built a Multi-Agent AI System in n8n Using Sub-Workflows.” May 2025. https://community.n8n.io/t/how-i-built-a-multi-agent-ai-system-in-n8n-using-sub-workflows-example/120176
[4] n8n Blog. “AI Agent Architecture Patterns: Pick the Right Topology.” May 2026. https://blog.n8n.io/ai-agent-architecture-patterns/
Reviews are independent and based on hands-on testing. Some links may be affiliate links — we earn a commission if you purchase, at no extra cost to you. This never affects our recommendations.